
1.3 Joomla! Installation
Filed Under ( Joomla, MySQL, PHP, Programming, Technology, Tutorial ) by admin on 10-09-2009
Tagged Under : easy learn joomla programming, Joomla, joomla code, joomla programming, MyS, PHP
Next, we will install Joomla! In this tutorial, we will use Joomla! 1.5.3.
Beneath are the steps in instalating the Joomla! 1.5.3:
1. Download Joomla! 1.5.3 from the Joomla! official site. There are various choises of compression. The writer use Joomla_1.5.3-Stable-Full_Package.tar.gz.
Picture 1.17 Joomla! compression file
2. Next, extract the file by clicking right of it then choose Extract to joomla_1.5.3-Stable-Full_Package\ as you can see in the picture 1.18. But with one condition, you use Winrar.
Picture 1.18 Compression file extra
3. You will get the extraction result folder as in the picture 1.19. Rename the folder by the name that you want, such as “myjoomla” (without quotation mark).
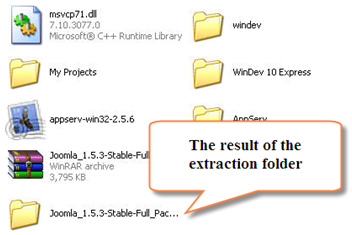
Picture 1.19 The result of the extraction folder
4. Next, move the myjoomla folder into c:/AppServ/www.
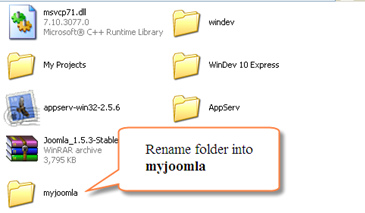 Picture 1.20 Change the name folder into myjoomla
 Picture 1.21 Joomla! folder location
5. Now open your browser and direct it into http://localhost/myjoomla. You will get the appearance as in the picture 1.22.
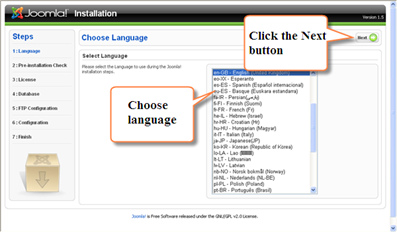
Picture 1.22 The beginning appearance of Joomla! installation
6. You will ask to choose the language. By default, the language is English language (En-GB).
7. Click the Next button that is located in the upper right to continue.
8. Next, Joomla! will check all of your computer system. You can see it in the picture 1.23. If you use the AppServer 2.5.6 installation package, it seems that it is already according to the Joomla! demand.
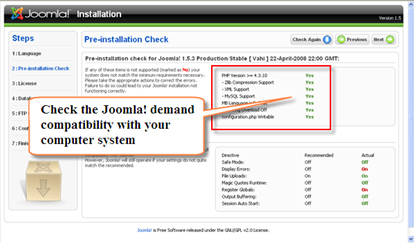
Picture 1.23 Check before installation
For the lower part, if there is incompatibility, it can be still tolerance by Joomla! Remember that this book is not explain about the server configuration detail. So, please take a look of its information in Internet or another book about the Apache and PHP configuration.
9. The next page is the agreement of obeying the license that is given. If you agree, please click the Next button.
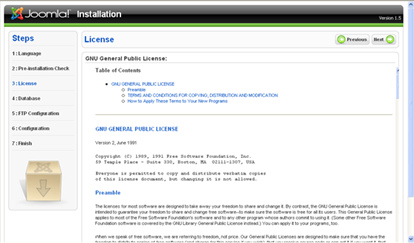
Picture 1.24 The agreement toward the using license
10. The next step is about the database configuration. You will get the appearance as in the picture 1.25.
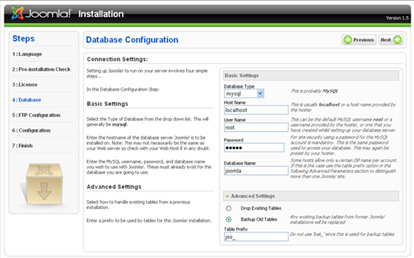 Picture 1.25 Database configuration
Here are the items that you should have to fill:
- Database Type, we choose mysql in this training session.
- Host Name, fill with localhost.
- User Name, fill with root.
- Password, fill with password for database which already you set in the time of the AppServer installation.
- Database Name, fill with the database name which already you choose in the sub chapter 1.2, for example joomla.
Next, click the Next button.
11. The next page is about the FTP configuration. For this time, just ignore it. Click the Next button.
Picture 1.26 FTP Configuration, just ignore it
12. Furthermore, you will get the main configuration page of your web. The page will be seen as in the picture 1.27.
Picture 1.27 Web configuration
Before continue, it is better for you to install the example data. Click the Install Sample Data button that is located in the middle of that page.
If the installation is succeeded, you will get the message as in the picture 1.28.
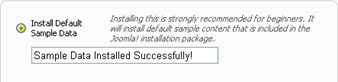
Picture 1.28 Install default sample data
Then, fill the items in the upper page as the following:
- Site Name
- Your Email
- Admin Password
- Confirm Admin Password
After that, click the Next button.
13. Last, you will get the appearance as in the picture 1.29.
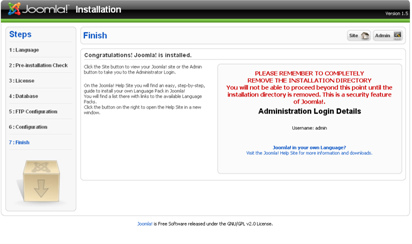
Picture 1.29 Joomla! installation is finish
Before we enter the Joomla! administrator page or the Joomla! front page, we have get a little job to do. Open your Windows Explorer again. Open myjoomla folder. Delete the installation folder. These are just for the security reason.
Picture 1.30 Delete the folder installation
After delete the folder, you can open the Joomla! front page right now. That is why, just open your browser. Then, type http://localhost/myjoomla. You will get the appearance as in the picture 1.31.
But if you want to see the administrator page, you can access it through http://localhost/myjoomla/administrator. Then, enter username and password that you have been set. By default, username for administrator is admin while password is according to what you want.
Picture 1.31 The Joomla! front page appearance
The target of this chapter is already attainable. You are already succeeded in installing Joomla! better. You can stop in a moment and celebrate this moment by drinking a cup of coffee or tea.
In the next chapter, we will recognize about the operasional way from this Content Management System at a glance. Are you ready? Let’s go!
Related posts: